AVT 667-Tempera Paint

To my recollection, I had never used tempera paint prior to our in-class experimentation.  Now that I have, here is how I would describe working with it: Take a mustard bottle and let it sit in your fridge, untouched, for at least a week.  Take it out and, without shaking it first, squeeze it into a small paper cup.  Now take that residue and try to paint with it. 

Jokes aside, I found tempera to be watery, thin, and runny.  I had an exceedingly difficult time controlling it, or building up any kind of color, especially on dark paper.  I understand the appeal to teach this in an elementary school art class, as low cost, readily available and hazard free materials are mighty compelling.  With the caveat that my experience is limited, I just don’t think tempera paint is worth the effort.  Anything you have to fight with this much I fear would be a deterrent to a student’s further interest in painting.  They’d simply think “Painting is hard, guess it’s not for me!” and walk away.  

As this blog is for a school assignment, I don’t know if “hard pass” is an option for any of these materials.  If it is, I’d say leave tempera paint out of the equation entirely in favor of the more malleable, user friendly and opaque acrylic paint. 

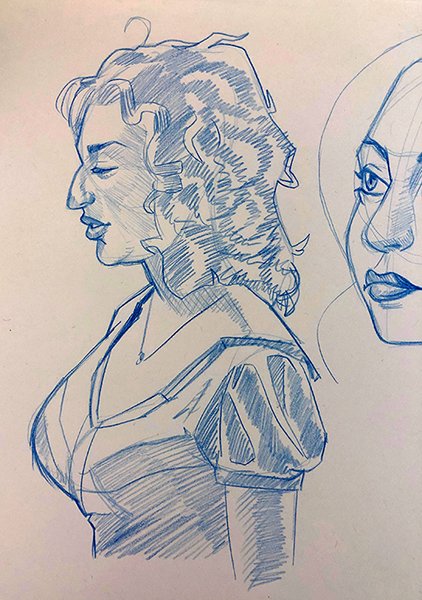
This is the only image I kept from class, as everything else looked like I’d tried to paint on black paper with watered down Kool-Aid:

AVT 667-Pastels

I’ve never been great with pastels.  Do you treat them like a drawing tool, or more like a painting tool?  The answer, of course, is “yes.”  Pastels seem to occupy this grey area between drawing and painting, and as such, are a good transition point for students in moving from one medium to the next.  When a fine line is needed, the edge or corner of a chalk pastel block can do the job.  If large areas of color coverage are what’s desired, turn a pastel on its side and go to town.  After pigment has been applied, it can be further manipulated with a finger, a blending stump, a rag, a cotton swab or a brush.  With a little bit of practice, intricate gradations and delicate color blending are easily achievable.  Even more so than with graphite or colored pencils, the texture of the drawing surface plays a substantial role in the final piece.  Every minute detail of the paper or canvas will show through the pigment, opening up a world of expressive opportunities.   

Of note, chalk pastel takes the form of a fine powder, liable to explode into the air in a technicolor mist if someone so much as sneezes near it.  For this reason, fixative is recommended, and with fixative come the same warnings issued previously: For adult use only, and don’t spray it in an enclosed area. 

Resources

Chalk Pastel Techniques for Beginners (Video)- https://www.youtube.com/watch?v=oj2sEXs4XZY

Covers blending, hatching and crosshatching, side strokes, layering, feathering, pointillism and basic drawing. 

Pastel Tutorial Archives- https://www.hodgepodge.me/category/hmscl/pttl/

A series of pastel tutorials intended for children. 

My in class experimentations with chalk pastels, featuring McDonald’s mascot “Grimace”, a desert island infested with bats, and Teenage Mutant Ninja Turtle Michaelangelo.  All the standard subject matter from my aesthetic…

Playing around with mark making:

AVT 667-Colored Pencils

Colored pencils fall into the same category of enthusiasm I reserved for graphite: They are versatile tools, cheap, easy to be grasped by anyone, and capable of the same wide range of expressive qualities as standard pencils with the added benefit of incorporating color.  Color and pencil are like peanut butter and chocolate, two great tastes that taste great together. 

That said, I do believe that the addition of color to the medium can be paralyzing for some artists (it was for me, for awhile).  Color is a skillset in and of itself, subject to its own rules and working methods.  Switching from a graphite pencil to a colored pencil is not a 1 to 1 translation, as now the artist must think about color harmony, temperature, saturation and a whole host of other concerns beyond just value.  For this reason, I’d recommend at least an introductory color theory lesson before bringing them into the curriculum.  Explaining primary, secondary, and complimentary colors will go a long way towards making students feel more comfortable before working with these things.  

I’d also spend some time covering the various means of combining colors with colored pencils.  This too is something I struggled with when I first started playing around with them.  Multiple colors can be used to crosshatch, stipple, layer, overlay, and create smooth gradations, but these methods aren’t always immediately obvious to novices.  If you want to get really crazy, solvents can be added into the mix causing the binding agent of the pencil to breakdown and the pigment to act almost like paint.  A color can be laid down and manipulated on the surface using solvent and a paintbrush.  Solvents can be toxic, so this method may best be reserved for older students.   

The following resources may be helpful in teaching students colored pencil blending techniques: 

“The Only Methods You’ll Ever Need for Blending Colored Pencil” Carrie L. Lewis

https://www.carrie-lewis.com/3-methods-blending-colored-pencil/ 

“8 Ways on How to Blend Colored Pencils Like a Pro” Jae Johns

https://jaejohns.com/how-to-blend-colored-pencils/

In class I tried my hand at Crayola “Color Sticks” which seem to be the halfway point between a traditional colored pencil and a pastel.  Their large, blocky, hard edged shape made them a little unwieldy for the type of line drawing I was trying to do, but I could immediately see how intuitive they’d be for a more painterly approach, and I liked the way they reacted to the textured paper.

In my sketchbooks, I almost always work in red or blue colored pencil (or blue ballpoint pen). I like the “glide” of a pencil, but with graphite, I find I tend to go too dark too early, and I leave smudges and fingerprints all over the place. Colored pencils have the same range, feel and texture of graphite, but without some of the drawbacks. These are all from my sketchbook, but I always have trouble taking good photos so apologies in advance for the image quality.